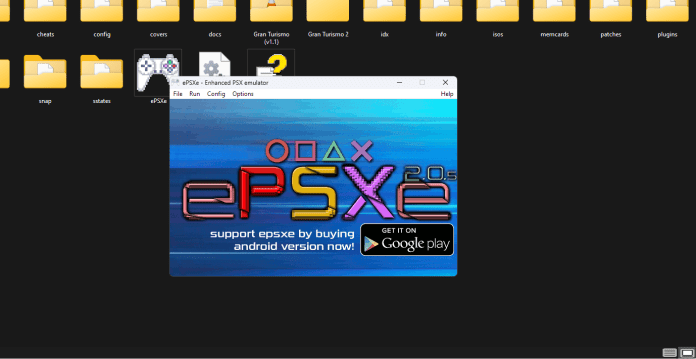
If you’ve ever wanted to relive the nostalgia of classic PlayStation games, the ePSXe emulator is one of the best ways to do it. In this guide, I’ll walk you through the setup process for ePSXe, ensuring you’re ready to dive back into your favorite titles. Let’s get started!
What is ePSXe?
ePSXe, or enhanced PSX emulator, is a widely-used emulator that allows you to play PlayStation games on your computer or mobile device. It’s known for its high compatibility, excellent performance, and ability to enhance graphics through various plugins.
Why Use ePSXe?
Using ePSXe has several advantages:
- Wide Compatibility: ePSXe supports a vast library of PlayStation games.
- Graphic Enhancements: You can improve the graphics of your favorite games with plugins.
- Save States: The emulator allows you to save your progress at any point.
- Customizable Controls: You can map controls to your preference.
System Requirements
Before I start the setup process, it’s essential to ensure your system meets the minimum requirements for ePSXe:
- Operating System: Windows, macOS, or Linux
- Processor: At least a dual-core CPU
- RAM: 2GB or more
- Graphics Card: OpenGL 2.0 compatible
- Disk Space: Minimum 300MB for the emulator and additional space for games
Step 1: Download ePSXe
First, I need to download the latest version of ePSXe from the official website. Here’s how:
- Visit the ePSXe official website.
- Click on the download link for your operating system (Windows, Linux, or Android).
- Save the installer file to your preferred location.
Step 2: Install ePSXe
Once the download is complete, follow these steps to install ePSXe:
- Locate the downloaded file and double-click it to run the installer.
- Follow the installation wizard prompts. I recommend installing ePSXe in the default location for ease of access.
- Once the installation is complete, I open the ePSXe application.
Step 3: Configure ePSXe
BIOS Setup
ePSXe requires a PlayStation BIOS file to function correctly. Here’s how to set it up:
- Download the BIOS: I need to obtain the BIOS file. You can find it online, but ensure it’s from a reputable source. Look for files named
SCPH1001.bin,SCPH7502.bin, or similar. - Locate the BIOS Folder: After downloading the BIOS file, I place it in the BIOS folder of the ePSXe installation directory. This folder is usually located at
C:\Program Files\ePSXe\bioson Windows. - Select the BIOS in ePSXe:
- Open ePSXe and go to
Config>BIOS. - I’ll select the BIOS file I just added.
Graphics Plugin
Next, I need to configure the graphics plugin:
- Go to
Config>Video>Plugin Settings. - Choose the default graphics plugin (usually
Pete's OpenGL2 Driver). - Adjust the settings according to my preferences (resolution, texture filtering, etc.).
- Click
OKto save the changes.
Sound Plugin
For the sound plugin, I follow these steps:
- Navigate to
Config>Sound>Plugin Settings. - Select the default sound plugin (often
ePSXe SPU core). - Adjust the sound settings if necessary.
- Click
OKto save.
Controller Configuration
To set up my controller:
- Go to
Config>Pad>Port 1. - I can use my keyboard or an external controller. If I’m using a controller, I select
Auto Detectto configure it automatically or manually map the buttons. - Click
OKwhen finished.
Step 4: Load a Game
Now that everything is set up, let’s load a game:
- I need to have a PlayStation game in ISO format. If I don’t have one, I can create an ISO from my original PlayStation CDs using software like ImgBurn or PowerISO.
- To load the game in ePSXe, I go to
File>Run ISO. - I navigate to the folder where my game is stored and select the ISO file.
- My game should now load, and I can start playing!
Step 5: Save States and Configuration
One of the best features of ePSXe is the ability to save states:
- To save my current game state, I press
F1(or the configured key). - To load a saved state, I press
F3.
Additionally, I can configure ePSXe settings further by exploring the Config menu. Here, I can tweak performance and compatibility settings based on the games I play.
Troubleshooting Common Issues
While setting up ePSXe is usually straightforward, I might encounter some issues. Here are some common troubleshooting tips:
Game Not Loading
- Ensure I have the correct BIOS file in the right folder.
- Verify that the game ISO is not corrupted.
Low Performance
- Adjust graphics settings in the plugin configuration.
- Close unnecessary applications running in the background.
Controller Not Working
- Check that the controller is correctly connected and configured in ePSXe.
- Try a different USB port or restart ePSXe.
Additional Resources
If I want to enhance my ePSXe experience or learn more about specific configurations, here are some additional resources:
- ePSXe Official Forum – A great place to ask questions and find answers from the community.
- Reddit r/emulation – A subreddit dedicated to emulation, where I can find tips and discussions.
- GameFAQs – For game-specific FAQs and guides.
Conclusion
Setting up the ePSXe PlayStation emulator can transform my gaming experience, allowing me to rediscover classic titles with modern enhancements. By following this step-by-step guide, I’ve configured ePSXe to play my favorite PlayStation games efficiently. Happy gaming!


.jpg?w=100&resize=100,70&ssl=1)
