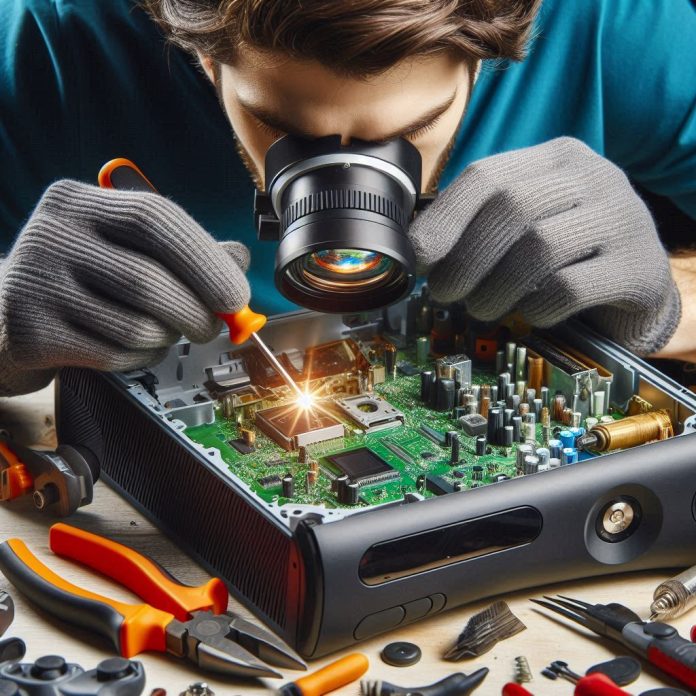
As a passionate gamer, I understand how frustrating it can be when your Xbox 360 starts showing signs of trouble. One common issue that many of us face is the malfunctioning laser, which can prevent the console from reading discs properly. In this guide, I will walk you through the process of repairing the Xbox 360 laser, sharing tips and tricks that I’ve learned along the way.
Understanding the Problem
Before we jump into the repair process, let’s understand what might be causing the laser issues in your Xbox 360. Some common symptoms include:
- Disc Read Errors: Your console may display messages indicating that it cannot read the disc.
- Unusual Noises: Grinding or whirring sounds coming from the drive could indicate a laser alignment problem.
- Game Freezing: If your games freeze frequently, it might be related to the laser’s performance.
Diagnosing the Issue
When I first encountered a laser issue with my Xbox 360, I took the time to diagnose the problem accurately. Here are some steps I followed:
- Check the Disc: Ensure that the disc is clean and free from scratches. A dirty or damaged disc can easily lead to read errors.
- Test Other Games: Try running different games to rule out the possibility of a single defective disc.
- Inspect the Console: Look for any visible damage to the console, especially around the disc tray and laser assembly.
Tools You’ll Need
Before we dive into the repair process, gather the necessary tools. I found that having everything ready made the process smoother:
- Screwdriver Set: A Torx screwdriver is necessary for opening the Xbox 360.
- Replacement Laser Lens: Purchase a compatible laser lens for your specific Xbox 360 model.
- Cleaning Supplies: Use a microfiber cloth and isopropyl alcohol to clean the optical lens.
- Multimeter: Helpful for testing electrical connections.
Step-by-Step Repair Process
Step 1: Prepare Your Workspace
It’s essential to set up a clean and organized workspace. I recommend working on a static-free surface and ensuring you have good lighting. Lay out all your tools and parts in an orderly fashion.
Step 2: Open the Xbox 360 Console
- Remove the Faceplate: Gently pry off the faceplate using a flathead screwdriver.
- Unscrew the Console: Use your Torx screwdriver to remove the screws from the console. Keep track of where each screw goes.
- Open the Case: Carefully lift the top cover to expose the internal components.
Step 3: Access the Disc Drive
- Locate the Disc Drive: The disc drive is typically located on the left side of the console.
- Disconnect the Drive: Unplug the power and data cables connected to the disc drive.
Step 4: Remove the Laser Assembly
- Unscrew the Drive: Remove the screws holding the drive in place.
- Take Out the Drive: Gently slide the entire drive out of the console.
- Open the Drive: Locate the screws on the disc drive casing and remove them to access the laser assembly.
Step 5: Replace the Laser Lens
- Remove the Old Lens: Carefully detach the old laser lens from the assembly. Be mindful of any connectors.
- Install the New Lens: Connect and secure the new laser lens in place, ensuring that it fits correctly.
Step 6: Clean the Optical Lens
Before reassembling, clean the optical lens with a microfiber cloth and isopropyl alcohol. This step is crucial for optimal performance.
Step 7: Reassemble the Console
- Put the Drive Back: Slide the disc drive back into the console and reconnect the power and data cables.
- Secure the Console: Reattach the top cover and secure it with screws.
- Reattach the Faceplate: Snap the faceplate back onto the console.
Step 8: Test the Console
Power up your Xbox 360 and insert a game disc. If everything went smoothly, your console should now read the disc without issues!
Tips for Maintaining Your Xbox 360 Laser
Once you’ve repaired your Xbox 360 laser, it’s essential to keep it in good condition. Here are some maintenance tips I’ve found helpful:
- Keep it Dust-Free: Regularly clean the console and keep it in a dust-free environment.
- Avoid Overheating: Ensure that the console has proper ventilation to prevent overheating.
- Store Discs Properly: Always store your game discs in their cases to avoid scratches and dirt.
Additional Resources
If you want to dive deeper into Xbox 360 repairs or gaming in general, consider checking out the following resources:
Conclusion
Repairing your Xbox 360 laser can seem daunting at first, but with the right tools and guidance, it can be a manageable task. I hope this guide has provided you with the information you need to successfully fix your console. Remember, patience and attention to detail are key in this process. Happy gaming!
Final Thoughts
If you found this guide helpful, please share it with fellow gamers who might be facing similar issues. Repairing consoles can save money and extend the life of our beloved devices. Should you have any questions or need further assistance, feel free to reach out!
<iframe width="560" height="315" src="https://www.youtube.com/embed/AWjQ1ryr6ug?si=U0byoHNRlEWvYhb2" title="YouTube video player" frameborder="0" allow="accelerometer; autoplay; clipboard-write; encrypted-media; gyroscope; picture-in-picture; web-share" referrerpolicy="strict-origin-when-cross-origin" allowfullscreen></iframe>


.jpg?w=100&resize=100,70&ssl=1)
