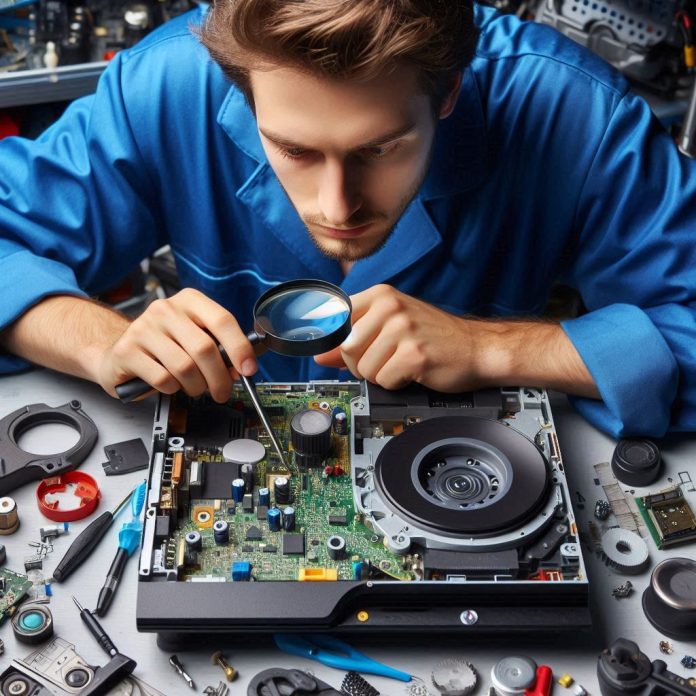
As an avid gamer, I understand the frustration that comes when your PlayStation 3 (PS3) starts showing signs of malfunction, especially when it comes to the laser. If you’ve encountered issues like your PS3 not reading discs, skipping during gameplay, or showing error messages, it could be a problem with the laser. In this guide, I will walk you through the steps for repairing or replacing the laser in your PS3. This article aims to provide you with a comprehensive overview to help you get your gaming console back in optimal condition.
Understanding the PS3 Laser
The laser in your PS3 is a critical component responsible for reading game discs, CDs, and DVDs. Over time, it can wear out or become misaligned, leading to performance issues. Understanding how the laser works and its common problems can be beneficial before diving into repairs.
Common Symptoms of a Failing Laser
Before proceeding with the repair process, it’s essential to recognize the symptoms of a failing laser. Here are some signs that may indicate a laser issue:
- Inability to Read Discs: If your PS3 is unable to read any discs, the laser may be defective or misaligned.
- Frequent Skipping: If your games skip or freeze, it could be a sign of a dirty or failing laser.
- Error Messages: Messages like “Disc Read Error” often indicate problems with the laser.
- Noisy Operation: Unusual sounds during disc reading can imply that the laser is struggling to function correctly.
Tools and Materials Needed
Before starting the repair process, gather the following tools and materials:
- Phillips screwdriver
- Torx screwdriver
- Replacement laser assembly
- Anti-static wrist strap
- Cleaning cloth
- Isopropyl alcohol
- Flashlight
Safety Precautions
Before we start, I want to emphasize the importance of safety. Ensure your PS3 is unplugged, and avoid touching any internal components without an anti-static wrist strap to prevent electrical damage.
Step-by-Step Repair Process
Step 1: Disassemble the PS3
- Remove the Screws: Start by unscrewing the PS3 casing. Use the Phillips screwdriver for the screws on the top and Torx screwdriver for those on the bottom.
- Lift the Cover: Carefully detach the top cover from the console, taking care not to damage any clips or connectors.
Step 2: Access the Laser Assembly
- Remove the Drive Bay: Once the cover is off, locate the Blu-ray drive. Unscrew and disconnect it from the motherboard.
- Detach the Drive Cover: Remove the cover of the drive to access the laser assembly.
Step 3: Inspect the Laser Assembly
- Check for Obstructions: Look for dust, dirt, or any physical damage to the laser.
- Clean the Laser Lens: Use a soft cloth and isopropyl alcohol to gently clean the lens of the laser.
Step 4: Replace the Laser Assembly
- Remove the Old Laser: Carefully unscrew and disconnect the old laser assembly from the drive.
- Install the New Laser: Connect and screw in the new laser assembly, ensuring it is securely in place.
Step 5: Reassemble the PS3
- Reattach the Drive Cover: Once the laser is replaced, put the drive cover back on and secure it with screws.
- Reconnect the Drive Bay: Attach the Blu-ray drive back to the motherboard and ensure all connections are secure.
- Replace the Console Cover: Finally, put the top cover back on and secure it with screws.
Testing the Repair
After reassembling the PS3, it’s time to test whether the laser repair was successful:
- Plug in the Console: Connect your PS3 to power and your TV.
- Insert a Disc: Try inserting a game or movie and see if the console reads it correctly.
- Check for Performance: Play a game to ensure there are no skipping or freezing issues.
Troubleshooting Common Issues
If your PS3 still isn’t functioning correctly after the repair, consider the following troubleshooting tips:
- Recheck Connections: Ensure all connections are secure and that the laser is correctly installed.
- Clean the Discs: Sometimes, the issue may not be with the console but with dirty or scratched discs.
- Consider Professional Help: If you’re still having problems, it may be time to consult a professional repair service.
Conclusion
Repairing your PlayStation 3 laser can be a rewarding experience, allowing you to save money and extend the life of your beloved gaming console. With the right tools and a little patience, I hope you find this guide helpful in diagnosing and fixing your PS3 laser issues. Remember to follow safety precautions and take your time during the repair process.
Whether you’re a seasoned gamer or just someone who enjoys the occasional gaming session, keeping your PS3 in top shape is essential. With this guide, you should now have the knowledge and skills to tackle laser issues head-on. Happy gaming!
<iframe width="560" height="315" src="https://www.youtube.com/embed/TnsjMwhC6yE?si=-sUdhOWECjFMIdb5" title="YouTube video player" frameborder="0" allow="accelerometer; autoplay; clipboard-write; encrypted-media; gyroscope; picture-in-picture; web-share" referrerpolicy="strict-origin-when-cross-origin" allowfullscreen></iframe>


.jpg?w=100&resize=100,70&ssl=1)
